How To Make Bright Vocals
Achieving bright vocals can be a very challenging task to do, especially if you're dealing with a busy mix. This is why we're about to give some useful advices on how to achieve brighter vocals.
The different techniques I'm about to show may not work on the specific type of vocals. That's why I always mention to experiment and try different settings. Take my settings as your starting points and readjust from there, don't consider them your final points.

1. Cut sibilance, amplify highs
This simple trick will help you to easily achieve brighter vocals without increasing potential sibilances. Simply reduce some sibilance with your bell filter around 5-9kHz and add some brightness with a shelf filter at around 10-11kHz or more.
In terms of processing mode, you can stay with Zero Latency or experiment with Natural phase. However, if you're working with multi-mic recorded vocals, consider using a Linear phase to avoid phase cancellation between multiple vocal layers/takes.

2. Expansion on the highs
This trick does wonders in both mixing and mastering. But, what if we use it on vocals?
With our expander on vocals, I expanded some of the high end frequencies which helped me to re-gain some of the dynamics (this works the best after you applied compression). Don't also forget to gently compress the sibilances so they don't mess up with your final result.

3. Deal with resonances
When it comes to brightness, it's not all about adding. It's also about taking away frequencies that prevent our signal from being clean and bright. That's why it's highly important to attenuate resonant frequencies in vocals. This doesn't mean you must cut resonant frequencies on every single vocal. Take your time to carefully listen and check your vocals for any possible resonant frequencies.
Cutting up to 1-3dB will definitely do the job, and don't forget to go with narrow cuts. Don't overdo any of the cuts, and don't create too many of them.

4. High-End Reverb Send technique
Create a send channel for your reverb. Next, on your send channel, apply any reverb (I used the most basic one for easier understanding). Follow that by a post-EQ after your reverb and isolate the high end. Finally, blend your send channel with your main channel using faders.
5. De-essing + Exciting
Using an EQ to introduce Air & brightness to your vocals can also introduce harshness which isn't the result we're actually looking for.
6. De-essing + amplifying
This technique is very similar to the previous one, but in this case, we're going to use a multiband compressor to first gently compress the sibilar frequency range, and then enhance it using our EQ (high-shelf filter).
The plugins I used are FabFilter Pro MB (Compression) and Pro Q3 (EQ).

7. LKJB Luftikus for brightness
This plugin performs very well on vocals. I used it to brighten my vocals since it offers a very smooth sounding amplification which is the exact effect I wanted to achieve. Just remember to be very gentle and A/B results in order to decide if you made any positive differences to your vocals.
8. Where to learn more tricks for brighter vocals?
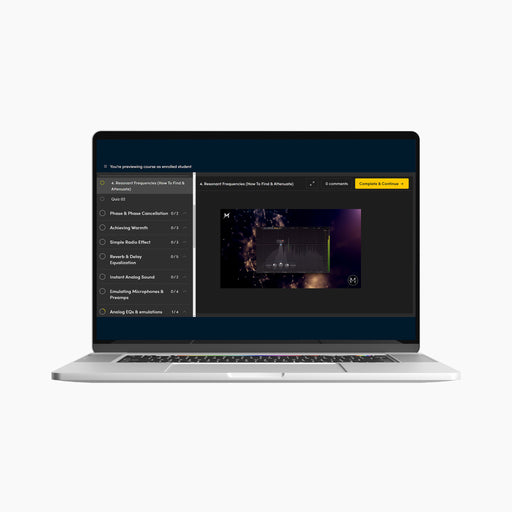
If you didn't know, we made the EQ Masterclass where we teach many different techniques on equalization. One of them is dedicated strictly to making brighter and crispier vocals using an EQ & other processors. At our EQ Masterclass, you'll be able to learn more about Air Band, Dynamic Air Band, using Upward Processing together with an EQ to achieve brighter vocals + a bunch more techniques covering brightness. Make sure to enroll today!

With EQ MASTERCLASS you will:
- Learn all the necessary fundamentals of music equalization
- Understand why is equalization important
- Learn how to use equalization as your biggest weapon for powerful mixes
- Attend Beginner to Pro lessons (5+ hours of video content)
- Test your knowledge after each lesson through quizzes
- Learn advanced EQ tricks used by pros
- Receive unique EQ presets made during the classes
- Receive 160+ pages EQ Book
Learn more from our best-sellers!
-
Pro C2 Presets Pack
Original price $34.99Original price $34.99 - Original price $34.99Original price $34.99Current price $17.50$17.50 - $17.50Current price $17.50Presenting long-awaited "Pro C2 Presets Pack" - The Exceptional FabFilter Pro C2 presets to completely change the way you approach dynamics treatme...
View full detailsOriginal price $34.99Original price $34.99 - Original price $34.99Original price $34.99Current price $17.50$17.50 - $17.50Current price $17.50Save 50% -
Saturn 2 Presets Pack
Original price $34.99Original price $34.99 - Original price $34.99Original price $34.99Current price $17.50$17.50 - $17.50Current price $17.50Presenting "Saturn 2 Presets Pack" - The Mind-Blowing FabFilter Saturn 2 presets to completely change the way you approach saturation on your mixes...
View full detailsOriginal price $34.99Original price $34.99 - Original price $34.99Original price $34.99Current price $17.50$17.50 - $17.50Current price $17.50Save 50% -
Presets Bundle
Original price $140.00Original price $140.00 - Original price $140.00Original price $140.00Current price $64.99$64.99 - $64.99Current price $64.99This Bundle Deal includes: Pro C2 Preset PackSaturn 2 Preset PackPro MB Preset PackEQ Preset Pack
Original price $140.00Original price $140.00 - Original price $140.00Original price $140.00Current price $64.99$64.99 - $64.99Current price $64.99Save 54% -
EQ + Compression Bundle
Original price $199.99Original price $199.99 - Original price $199.99Original price $199.99Current price $125.00$125.00 - $125.00Current price $125.00This Bundle Deal includes: The Art Of Compression:260+ pages of detailed explanationsBeginner to ProGraphic illustrationsSecret techniques used by ...
View full detailsOriginal price $199.99Original price $199.99 - Original price $199.99Original price $199.99Current price $125.00$125.00 - $125.00Current price $125.00Save 37% -
EQ Masterclass
Original price $100.00 - Original price $100.00Original price$100.00$100.00 - $100.00Current price $100.00Beginner to Pro lessons Everything you don't understand about Equalization is explained through 5h+ long Masterclass split in 28 well edited video...
View full detailsOriginal price $100.00 - Original price $100.00Original price$100.00$100.00 - $100.00Current price $100.00


