How To Use Upward Compression
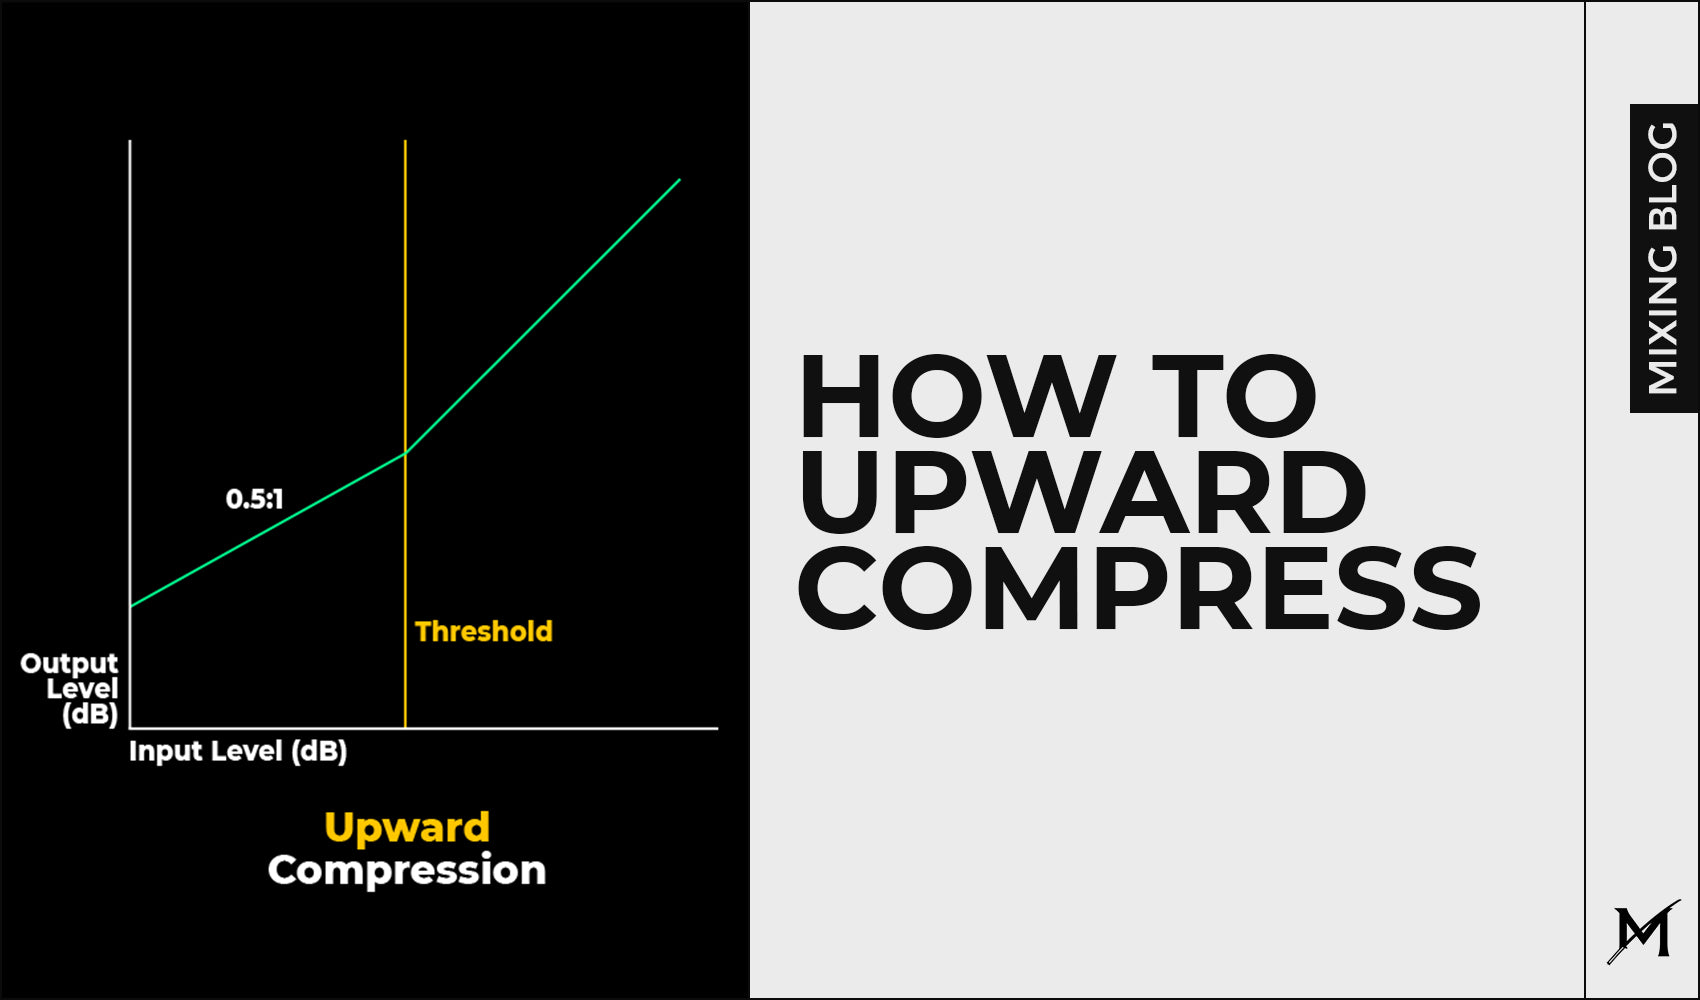
When either mixing or mastering, you can introduce upward compression or commonly called low-level compression to bring out more detail from your instruments, vocals or master.
In this blog post, my goal is to explain the process of using this type of compression. This means we'll be focusing on the exact steps on how to apply upward compression.
Please avoid copying any strict values you see in this blog post because every single instrument/vocals/mix/master is different and will require different treatment.

What is Upward Compression?

Downward vs Upward Compression
How to use Upward Compression?
Step 1 - Frequency Band Selection

I'm using our favorite FabFilter Pro MB which works great for upward compression.
The very first thing I'm doing is selecting the frequency band I want to affect using upward compression. In this case, I selected the whole frequency spectrum for the purpose of better understanding during this blog post. To achieve this, I used a FabFilter Pro MB which is actually a multiband compressor with an option for upward compression which I'm going to show in the next step.
Step 2 - Adjusting the range of compression

The default range in Pro MB will be set to negative. You need to change that.
Step 3 - Attack, Release & Ratio adjustments

This is where it all gets to your taste. No strict values!
Step 4 - The threshold adjustment

Again, this step is inverted than it is on downward compression.
Bonus 1: Alternatives

Waves MV2 - Downward & Upward Compressor

Sonnox Oxford Inflator - Legendary unit for upward processing!

Xfer Records OTT - The Legend.
Bonus 2: Parallel Upward Compression

Waves MV2 - Downward & Upward Compressor
Conclusion:
Upward Compression can be helpful in many different cases, all the way from mixing vocals, instruments or mastering. You just need to practice it and to know the right amount you need to apply. It takes time and listening practice.If you want to add a recommendation for the future blog post and get featured on, feel free to reach to our DM on Instagram or use our e-mail address: marko@md3sign.com
Learn more from our best-sellers!
-
Pro C2 Presets Pack
Original price $34.99Original price $34.99 - Original price $34.99Original price $34.99Current price $17.50$17.50 - $17.50Current price $17.50Presenting long-awaited "Pro C2 Presets Pack" - The Exceptional FabFilter Pro C2 presets to completely change the way you approach dynamics treatme...
View full detailsOriginal price $34.99Original price $34.99 - Original price $34.99Original price $34.99Current price $17.50$17.50 - $17.50Current price $17.50Save 50% -
Saturn 2 Presets Pack
Original price $34.99Original price $34.99 - Original price $34.99Original price $34.99Current price $17.50$17.50 - $17.50Current price $17.50Presenting "Saturn 2 Presets Pack" - The Mind-Blowing FabFilter Saturn 2 presets to completely change the way you approach saturation on your mixes...
View full detailsOriginal price $34.99Original price $34.99 - Original price $34.99Original price $34.99Current price $17.50$17.50 - $17.50Current price $17.50Save 50% -
Presets Bundle
Original price $140.00Original price $140.00 - Original price $140.00Original price $140.00Current price $64.99$64.99 - $64.99Current price $64.99This Bundle Deal includes: Pro C2 Preset PackSaturn 2 Preset PackPro MB Preset PackEQ Preset Pack
Original price $140.00Original price $140.00 - Original price $140.00Original price $140.00Current price $64.99$64.99 - $64.99Current price $64.99Save 54% -
EQ + Compression Bundle
Original price $199.99Original price $199.99 - Original price $199.99Original price $199.99Current price $125.00$125.00 - $125.00Current price $125.00This Bundle Deal includes: The Art Of Compression:260+ pages of detailed explanationsBeginner to ProGraphic illustrationsSecret techniques used by ...
View full detailsOriginal price $199.99Original price $199.99 - Original price $199.99Original price $199.99Current price $125.00$125.00 - $125.00Current price $125.00Save 37% -
EQ Masterclass
Original price $100.00 - Original price $100.00Original price$100.00$100.00 - $100.00Current price $100.00Beginner to Pro lessons Everything you don't understand about Equalization is explained through 5h+ long Masterclass split in 28 well edited video...
View full detailsOriginal price $100.00 - Original price $100.00Original price$100.00$100.00 - $100.00Current price $100.00


