Static Mix Technique
The market is overloaded with many different plugins, free & paid ones. But, do you really need them all in order to achieve a great sounding mix? Don't think so. Bring more focus on your STATIC MIX. Don't know what static mix is? Let's talk about that in this blog post.
In this blog, my goal is to explain what is static mix and how it can make sure you're going to mix with healthy levels and end up with a great sounding mix, which also depends on your skills & expertise.

What is Static Mix?
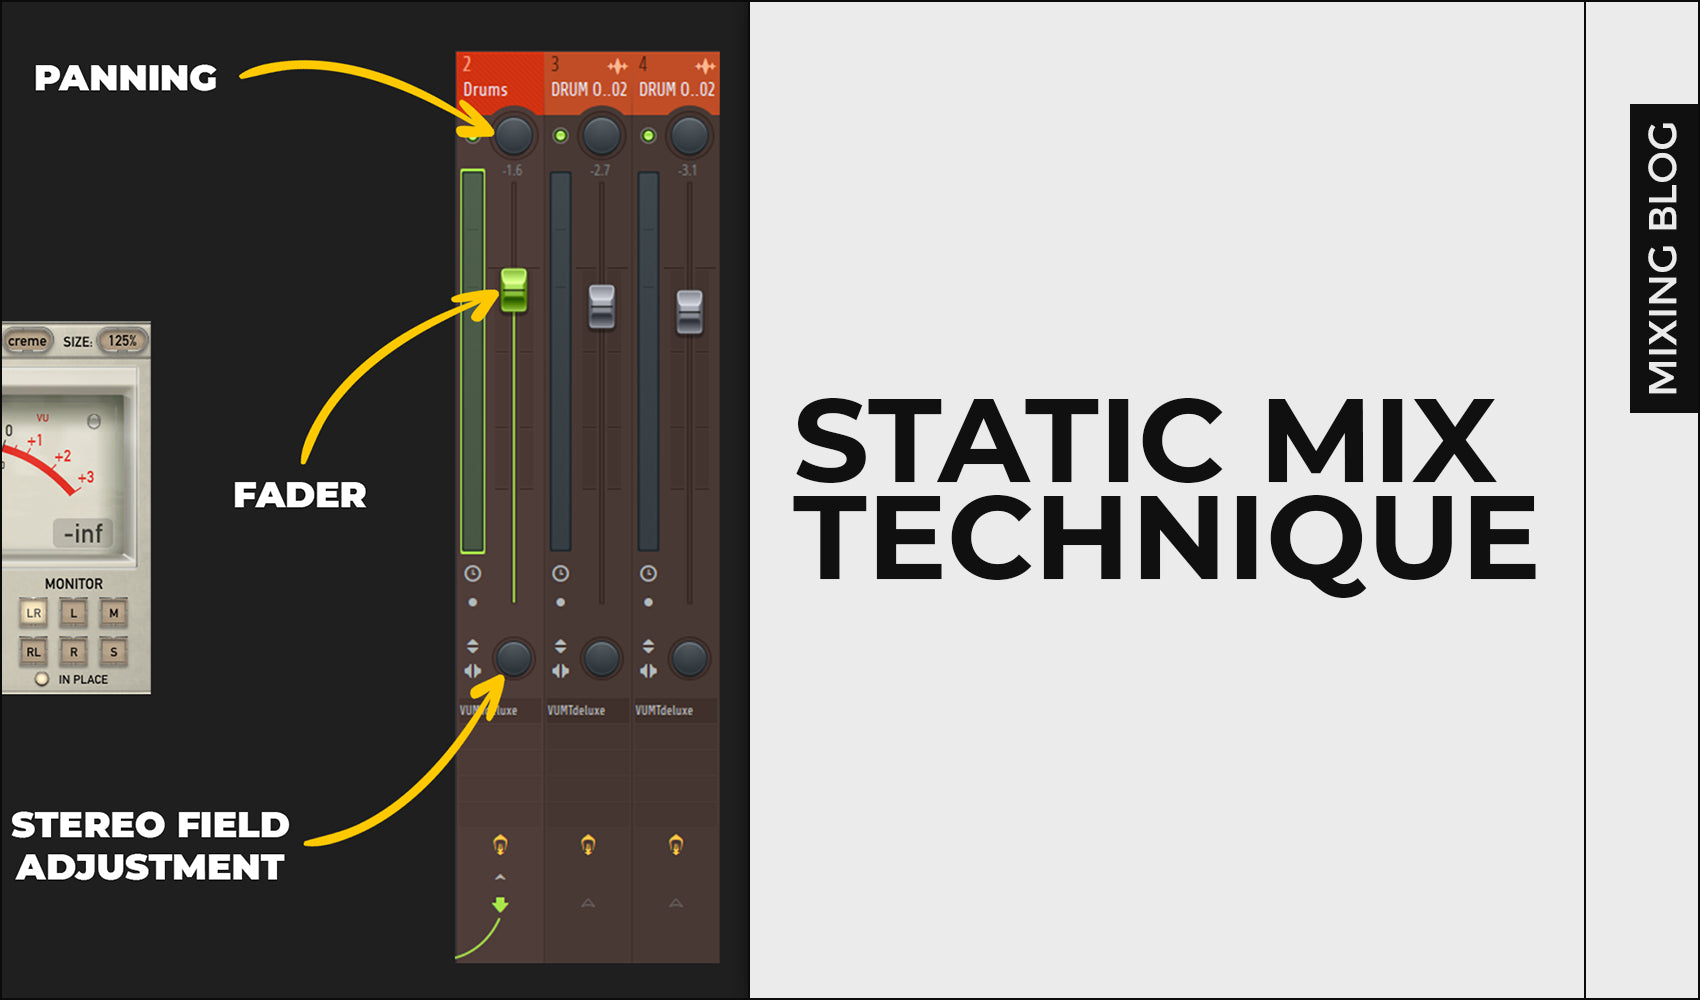
The whole theory behind static mix is very simple and straight-forward. These are basics. That means you're going to focus on basic features within your DAW in order to balance your mix. Basic features refer to faders, VU meters, panning and other stereo based tools. It doesn't matter how expensive plugins you have and how expensive outboard gear your studio is equipped with if you're not getting the basics (static mix) right. Below this paragraph, you can see the picture where I mentioned some of the basic tools you should master using before you actually buy all those "cool" and expensive plugins on the market which are great if you know how to use them properly.

Static Mix: Step 1 - Routing/Grouping
First thing you should do is to make sure each individual instrument/vocal/stem is sent to their own unique mixer channel. Color code each individual channel so you can visually know the differences between each instruments.
Next step is to create bus (or buss) channels. Bus channels are the channels where you route similar instrument group to. For example every instrument related to guitars will be routed to a Guitar Bus channel. Bus channels are used to easier process grouped instruments/vocals (for example when you want to enhance brightness, control the dynamic etc.).

Static Mix: Step 2 - Calibrating
VU Meters can be used to "calibrate" your sounds for a much better mixing session. Basically, you want to place a VU Meter on each individual channel in your mixer. Next, make sure to "calibrate" each sound so it hit around 0dBVU on your VU Meter. Once your sounds are calibrated, you can proceed to mixing. This is why you have all those VU Meters on an analog console for each individual channel.

Static Mix: Step 3 - Faders
Select the part of your track where you have most of the instruments/vocals playing and loop that part so it plays constantly. Now, bring all the faders in your mixer down. Go over to your most present instrument (such as Kick) and start increasing the fader up slowly until you reach around -10 to -8dBFS (just a starting point).
Right after this, start increasing more drum instruments so you get a nice balance overall (this is all up to your listening and judgements, no strict values).
Now, once you got some balance over drums, head over to either instrument groups such as bass, guitar, pianos or other instruments you used. Create a nice balance between them and your drums. Always watch out for headroom level and make sure your drums are still dominating slightly.
Finally, it's time to bring vocals in. Increase their faders and blend them with your instruments and drums. Always make sure that your lead vocal is significantly louder than your background vocals since they're used to support your lead vocals.
While doing all of this, you'll easily notice where the masking happens between different instruments. If you hear masking & clashing, don't worry. It's good that you hear it since you'll later know what you need to fix. Remember, we didn't use any plugins such as EQ, Compressors etc.
With all of this done, you made sure you're working with healthy levels and you also know what you need to fix, attenuate, boost, remove, add etc.
Static Mix: Step 4 - Panning & Stereo field
Right after getting healthy levels, you can proceed to panning and stereo field adjustments. You can pan and stereo adjust instruments using your inbuilt tools which are located mainly on your mixer such as panning & stereo width knob.
When panning, we usually keep main instruments/vocals in the center of your stereo field which makes sure they're meant to be upfront and in listeners face. This refers to kick, snare, bass, leads, vocals etc. However, I would suggest to avoid sticking to rules. There are many cases where some of there elements were in stereo and they sounded outstandingly. So, with that in mind, feel free to experiment.
In terms of stereo widening, you can make certain instruments slightly wider or narrower. That's all up to your decision, since there's no possibility of giving any strict starting points or whatsoever.

Static Mix: Step 5 - Plugins & Processors
Once you have a solid balance in terms of levels and stereo placement of each individual instrument/vocal, you can notice that you have a pretty solid sounding mix. Remember, you didn't apply any plugins/processors yet.
Master The Art Of EQUALIZATION with Md3sign Studio:
With EQ MASTERCLASS you will:
- Learn all the necessary fundamentals of music equalization
- Understand why is equalization important
- Learn how to use equalization as your biggest weapon for powerful mixes
- Attend Beginner to Pro lessons (5+ hours of video content)
- Test your knowledge after each lesson through quizzes
- Learn advanced EQ tricks used by pros
- Receive unique EQ presets made during the classes
- Receive 160+ pages EQ Book
Learn more from our best-sellers!
-
Pro C2 Presets Pack
Original price $34.99Original price $34.99 - Original price $34.99Original price $34.99Current price $17.50$17.50 - $17.50Current price $17.50Presenting long-awaited "Pro C2 Presets Pack" - The Exceptional FabFilter Pro C2 presets to completely change the way you approach dynamics treatme...
View full detailsOriginal price $34.99Original price $34.99 - Original price $34.99Original price $34.99Current price $17.50$17.50 - $17.50Current price $17.50Save 50% -
Saturn 2 Presets Pack
Original price $34.99Original price $34.99 - Original price $34.99Original price $34.99Current price $17.50$17.50 - $17.50Current price $17.50Presenting "Saturn 2 Presets Pack" - The Mind-Blowing FabFilter Saturn 2 presets to completely change the way you approach saturation on your mixes...
View full detailsOriginal price $34.99Original price $34.99 - Original price $34.99Original price $34.99Current price $17.50$17.50 - $17.50Current price $17.50Save 50% -
Presets Bundle
Original price $140.00Original price $140.00 - Original price $140.00Original price $140.00Current price $64.99$64.99 - $64.99Current price $64.99This Bundle Deal includes: Pro C2 Preset PackSaturn 2 Preset PackPro MB Preset PackEQ Preset Pack
Original price $140.00Original price $140.00 - Original price $140.00Original price $140.00Current price $64.99$64.99 - $64.99Current price $64.99Save 54% -
EQ + Compression Bundle
Original price $199.99Original price $199.99 - Original price $199.99Original price $199.99Current price $125.00$125.00 - $125.00Current price $125.00This Bundle Deal includes: The Art Of Compression:260+ pages of detailed explanationsBeginner to ProGraphic illustrationsSecret techniques used by ...
View full detailsOriginal price $199.99Original price $199.99 - Original price $199.99Original price $199.99Current price $125.00$125.00 - $125.00Current price $125.00Save 37% -
EQ Masterclass
Original price $100.00 - Original price $100.00Original price$100.00$100.00 - $100.00Current price $100.00Beginner to Pro lessons Everything you don't understand about Equalization is explained through 5h+ long Masterclass split in 28 well edited video...
View full detailsOriginal price $100.00 - Original price $100.00Original price$100.00$100.00 - $100.00Current price $100.00


