5 Tips to Improve Your Mixing!
Let's imagine a situation. You successfully finished your recording session, everything sounds good and you did some pre-mixing which also makes your satisfied with the results. Now, it's time to go to mixing and polish everything you recorded/produced. The mixing process can be exhausting due to either lack of knowledge, skills or just because you're not patient enough to get everything right.
Well, I’m going to go through some important tips that'll help you to improve your mixing skills and save your time.
Use Stems for Mixing
I may not be completely right for saying this, but this helped me A LOT. Once I'm done with the production or when my client is done with the production process, I always ask for stems. Not because it's easier for me to mix, but it's much easier to organize and to focus on mixing only. If you're mixing in the original production project, it's very likely for you to think "Well, let's change that, I don't like that", while when mixing with stems that's not possible which let's me completely focus on the mixing aspects.

Sorting & Using Bus Channels
This is a must, and everyone should know this. First, make sure to group/sort all your stems or files (if you're in the production stage). Every stem/file should have its own mixer channel. Next, you send multiple simple-orientated tracks to one channel which you can name depending on those elements. That's the process of Bussing channels. For example, the kick, clap, snare etc. can be routed to a bus named "Drums". You can do this for as many instrument groups as you want. Bussing helps to apply effects/processors directly on that instrument group without a need to go on individual channels. However, if there's a need to do on an individual channel, stick to that. Bus channels are also very useful when you want to quickly bring the volume up or down. For example, if your drums are too loud, you can quickly lower the bus channel fader and adjust to taste.

Use VU Meters
VU Meters can be used to "calibrate" your sounds for a much better mixing session. Basically, you want to place a VU Meter on each individual channel in your mixer. Next, make sure to "calibrate" each sound so it hit around 0dBVU on your VU Meter. Once your sounds are calibrated, you can proceed to mixing. This is why you have all those VU Meters on an analog console for each individual channel.

Clip Gain before fixing
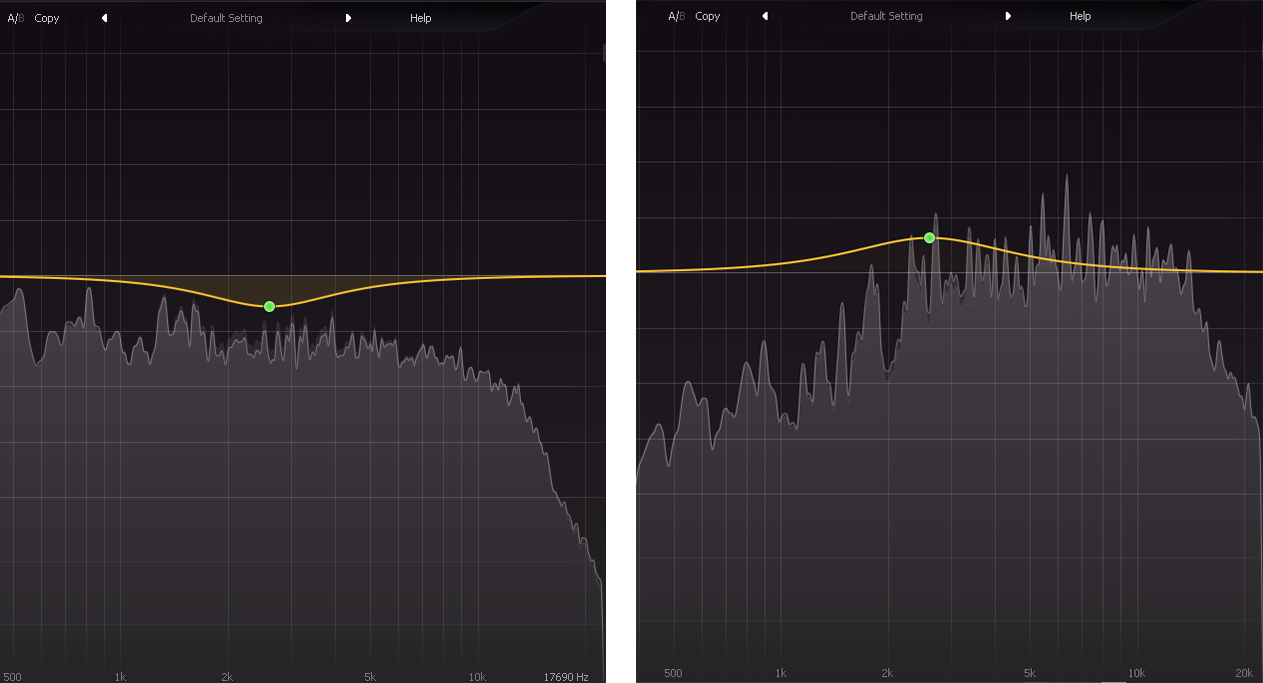
Complementary Equalization
Learn more from our best-sellers!
-
Pro C2 Presets Pack
Original price $34.99Original price $34.99 - Original price $34.99Original price $34.99Current price $17.50$17.50 - $17.50Current price $17.50Presenting long-awaited "Pro C2 Presets Pack" - The Exceptional FabFilter Pro C2 presets to completely change the way you approach dynamics treatme...
View full detailsOriginal price $34.99Original price $34.99 - Original price $34.99Original price $34.99Current price $17.50$17.50 - $17.50Current price $17.50Save 50% -
Saturn 2 Presets Pack
Original price $34.99Original price $34.99 - Original price $34.99Original price $34.99Current price $17.50$17.50 - $17.50Current price $17.50Presenting "Saturn 2 Presets Pack" - The Mind-Blowing FabFilter Saturn 2 presets to completely change the way you approach saturation on your mixes...
View full detailsOriginal price $34.99Original price $34.99 - Original price $34.99Original price $34.99Current price $17.50$17.50 - $17.50Current price $17.50Save 50% -
Presets Bundle
Original price $140.00Original price $140.00 - Original price $140.00Original price $140.00Current price $64.99$64.99 - $64.99Current price $64.99This Bundle Deal includes: Pro C2 Preset PackSaturn 2 Preset PackPro MB Preset PackEQ Preset Pack
Original price $140.00Original price $140.00 - Original price $140.00Original price $140.00Current price $64.99$64.99 - $64.99Current price $64.99Save 54% -
EQ + Compression Bundle
Original price $199.99Original price $199.99 - Original price $199.99Original price $199.99Current price $125.00$125.00 - $125.00Current price $125.00This Bundle Deal includes: The Art Of Compression:260+ pages of detailed explanationsBeginner to ProGraphic illustrationsSecret techniques used by ...
View full detailsOriginal price $199.99Original price $199.99 - Original price $199.99Original price $199.99Current price $125.00$125.00 - $125.00Current price $125.00Save 37% -
EQ Masterclass
Original price $100.00 - Original price $100.00Original price$100.00$100.00 - $100.00Current price $100.00Beginner to Pro lessons Everything you don't understand about Equalization is explained through 5h+ long Masterclass split in 28 well edited video...
View full detailsOriginal price $100.00 - Original price $100.00Original price$100.00$100.00 - $100.00Current price $100.00


